
How to Clean and Prepare Oysters for Outdoor Cooking
Understanding Oysters: Types and Characteristics
Oysters are a delicacy, prized for their briny, oceanic flavor and versatility in cooking. There are several types of oysters, each with unique characteristics that make them suitable for different culinary applications. Common varieties include Pacific oysters, Eastern oysters, Kumamoto oysters, and European flat oysters. Pacific oysters, for instance, are known for their mild, sweet flavor, while Eastern oysters have a more robust, salty taste. Kumamoto oysters are smaller and creamier, making them ideal for raw consumption, whereas European flat oysters boast a bold, metallic flavor that pairs well with grilling or smoking.
When selecting oysters for outdoor cooking, freshness is paramount. Look for oysters with tightly closed shells, as this indicates they are alive and safe to eat. The shell should feel heavy for its size, signaling that the oyster is full of liquid and fresh. Additionally, consider the flavor profile you want to achieve—some oysters are better suited for grilling, while others shine when smoked or steamed. Understanding these nuances will help you choose the best oysters for your outdoor cooking adventure.
Tools You’ll Need to Clean and Prepare Oysters
Cleaning and preparing oysters requires a few essential tools to ensure the process is safe, efficient, and effective. First and foremost, invest in a high-quality oyster knife. This specialized tool features a short, sturdy blade designed to pry open oyster shells without breaking them. Pair the knife with a durable pair of gloves, preferably made of thick rubber or cut-resistant material, to protect your hands during the shucking process.
A stiff-bristled brush is another must-have for cleaning oyster shells. This tool helps remove dirt, algae, and debris from the exterior of the shell, ensuring the oysters are clean and ready for cooking. A large bowl or bucket is useful for rinsing the oysters, while a clean towel provides a stable surface for shucking. For outdoor cooking, consider having a grill basket or smoking rack on hand to keep the oysters secure while they cook. With these tools, you’ll be well-equipped to handle oysters safely and efficiently.

How to Properly Clean Oysters
Cleaning oysters is a crucial step in preparing them for outdoor cooking. Oysters often come with dirt, sand, and other debris on their shells, which can affect the flavor and texture of the final dish. Follow these steps to ensure your oysters are clean and ready to cook.
Inspecting Oysters for Freshness
Before cleaning, inspect each oyster for freshness. Fresh oysters should have tightly closed shells; if a shell is open, gently tap it. If the oyster doesn’t close, it’s likely dead and should be discarded. Additionally, check for any cracks or damage to the shell, as this can indicate the oyster is no longer safe to eat. Fresh oysters should also smell clean and briny, like the ocean. If you detect any off-putting odors, discard the oyster immediately.
Scrubbing and Rinsing Techniques
Once you’ve sorted your oysters, it’s time to clean them. Start by rinsing the oysters under cold running water to remove loose dirt and debris. Next, use a stiff-bristled brush to scrub the shells thoroughly, paying extra attention to crevices where sand and algae may be trapped. Work over a sink or large bowl to catch any runoff. After scrubbing, give the oysters another rinse to ensure they’re completely clean. This step is essential for both hygiene and flavor, as a clean shell prevents unwanted grit from entering your dish.
How to Shuck Oysters Safely
Shucking oysters can be intimidating for beginners, but with the right technique and tools, it’s a manageable and rewarding process. Safety is key, as improper shucking can lead to injuries. Follow these guidelines to shuck oysters like a pro.
Step-by-Step Shucking Process
- Place the oyster flat side up on a clean towel or cutting board. Hold it firmly in place with one hand, using a glove for protection.
- Insert the tip of your oyster knife into the hinge—the pointed end where the two shells meet. Apply gentle pressure and wiggle the knife until you feel it slip into the hinge.
- Twist the knife to pop the shell open. Be careful not to force it, as this can damage the oyster meat.
- Slide the knife along the inside of the top shell to sever the muscle holding it closed. Remove the top shell and discard it.
- Carefully loosen the oyster meat from the bottom shell, ensuring it remains intact. Leave the meat in the shell for cooking or transfer it to a dish if preparing raw oysters.
Common Mistakes to Avoid When Shucking
One common mistake is using excessive force, which can break the shell and damage the oyster meat. Another error is neglecting to wear gloves, increasing the risk of cuts or punctures. Avoid using dull knives, as they make the process more difficult and dangerous. Finally, take your time—rushing can lead to accidents and unevenly shucked oysters.
Preparing Oysters for Outdoor Cooking
Once your oysters are cleaned and shucked, it’s time to prepare them for outdoor cooking. This step involves marinating, seasoning, and arranging the oysters to ensure they cook evenly and develop rich flavors.
Marinating and Seasoning Options
Oysters are incredibly versatile and pair well with a variety of marinades and seasonings. For a classic approach, drizzle them with melted butter, garlic, and fresh herbs like parsley or thyme. If you prefer bold flavors, try a spicy marinade with chili flakes, lime juice, and cilantro. For a smoky profile, use paprika, smoked salt, and a touch of olive oil. Experiment with different combinations to find the perfect flavor for your outdoor cooking method.
Prepping Oysters for the Grill
To prepare oysters for grilling, arrange them on a grill basket or directly on the grates with the meat side up. Ensure the oysters are stable to prevent them from tipping over and losing their juices. If you’re using a marinade, brush it onto the oysters just before placing them on the grill. This step enhances the flavor and prevents the oysters from drying out during cooking.
Outdoor Cooking Methods for Oysters
Outdoor cooking brings out the best in oysters, offering a variety of techniques to suit different tastes. Whether you prefer grilling, smoking, or steaming, each method adds unique flavors and textures to the oysters.
Grilling Oysters: Tips and Tricks
Grilling oysters is a popular choice for outdoor cooking. Preheat your grill to medium-high heat and place the oysters directly on the grates or in a grill basket. Cook them for 5-7 minutes, or until the edges of the meat curl and the juices bubble. For added flavor, top the oysters with a dollop of compound butter or a sprinkle of cheese before grilling.
Smoking Oysters for a Unique Flavor
Smoking oysters infuses them with a rich, smoky flavor that complements their natural brininess. Use a smoker or a grill with a smoking attachment. Arrange the oysters on a smoking rack and add wood chips like hickory or applewood for a subtle sweetness. Smoke the oysters at 225°F for 20-30 minutes, checking periodically to ensure they don’t overcook.
Steaming Oysters Outdoors
Steaming is a gentle cooking method that preserves the oysters’ tender texture. Use a large pot or outdoor steamer with a lid. Add water, white wine, or beer to the pot for extra flavor, and bring it to a boil. Place the oysters in a steaming basket and cover the pot. Steam for 5-10 minutes, or until the shells open slightly. Discard any oysters that remain closed after steaming.
Serving and Enjoying Your Oysters
Once your oysters are cooked, it’s time to serve and enjoy them. Presentation and pairings can elevate the experience, making it even more memorable.
Garnishes and Accompaniments
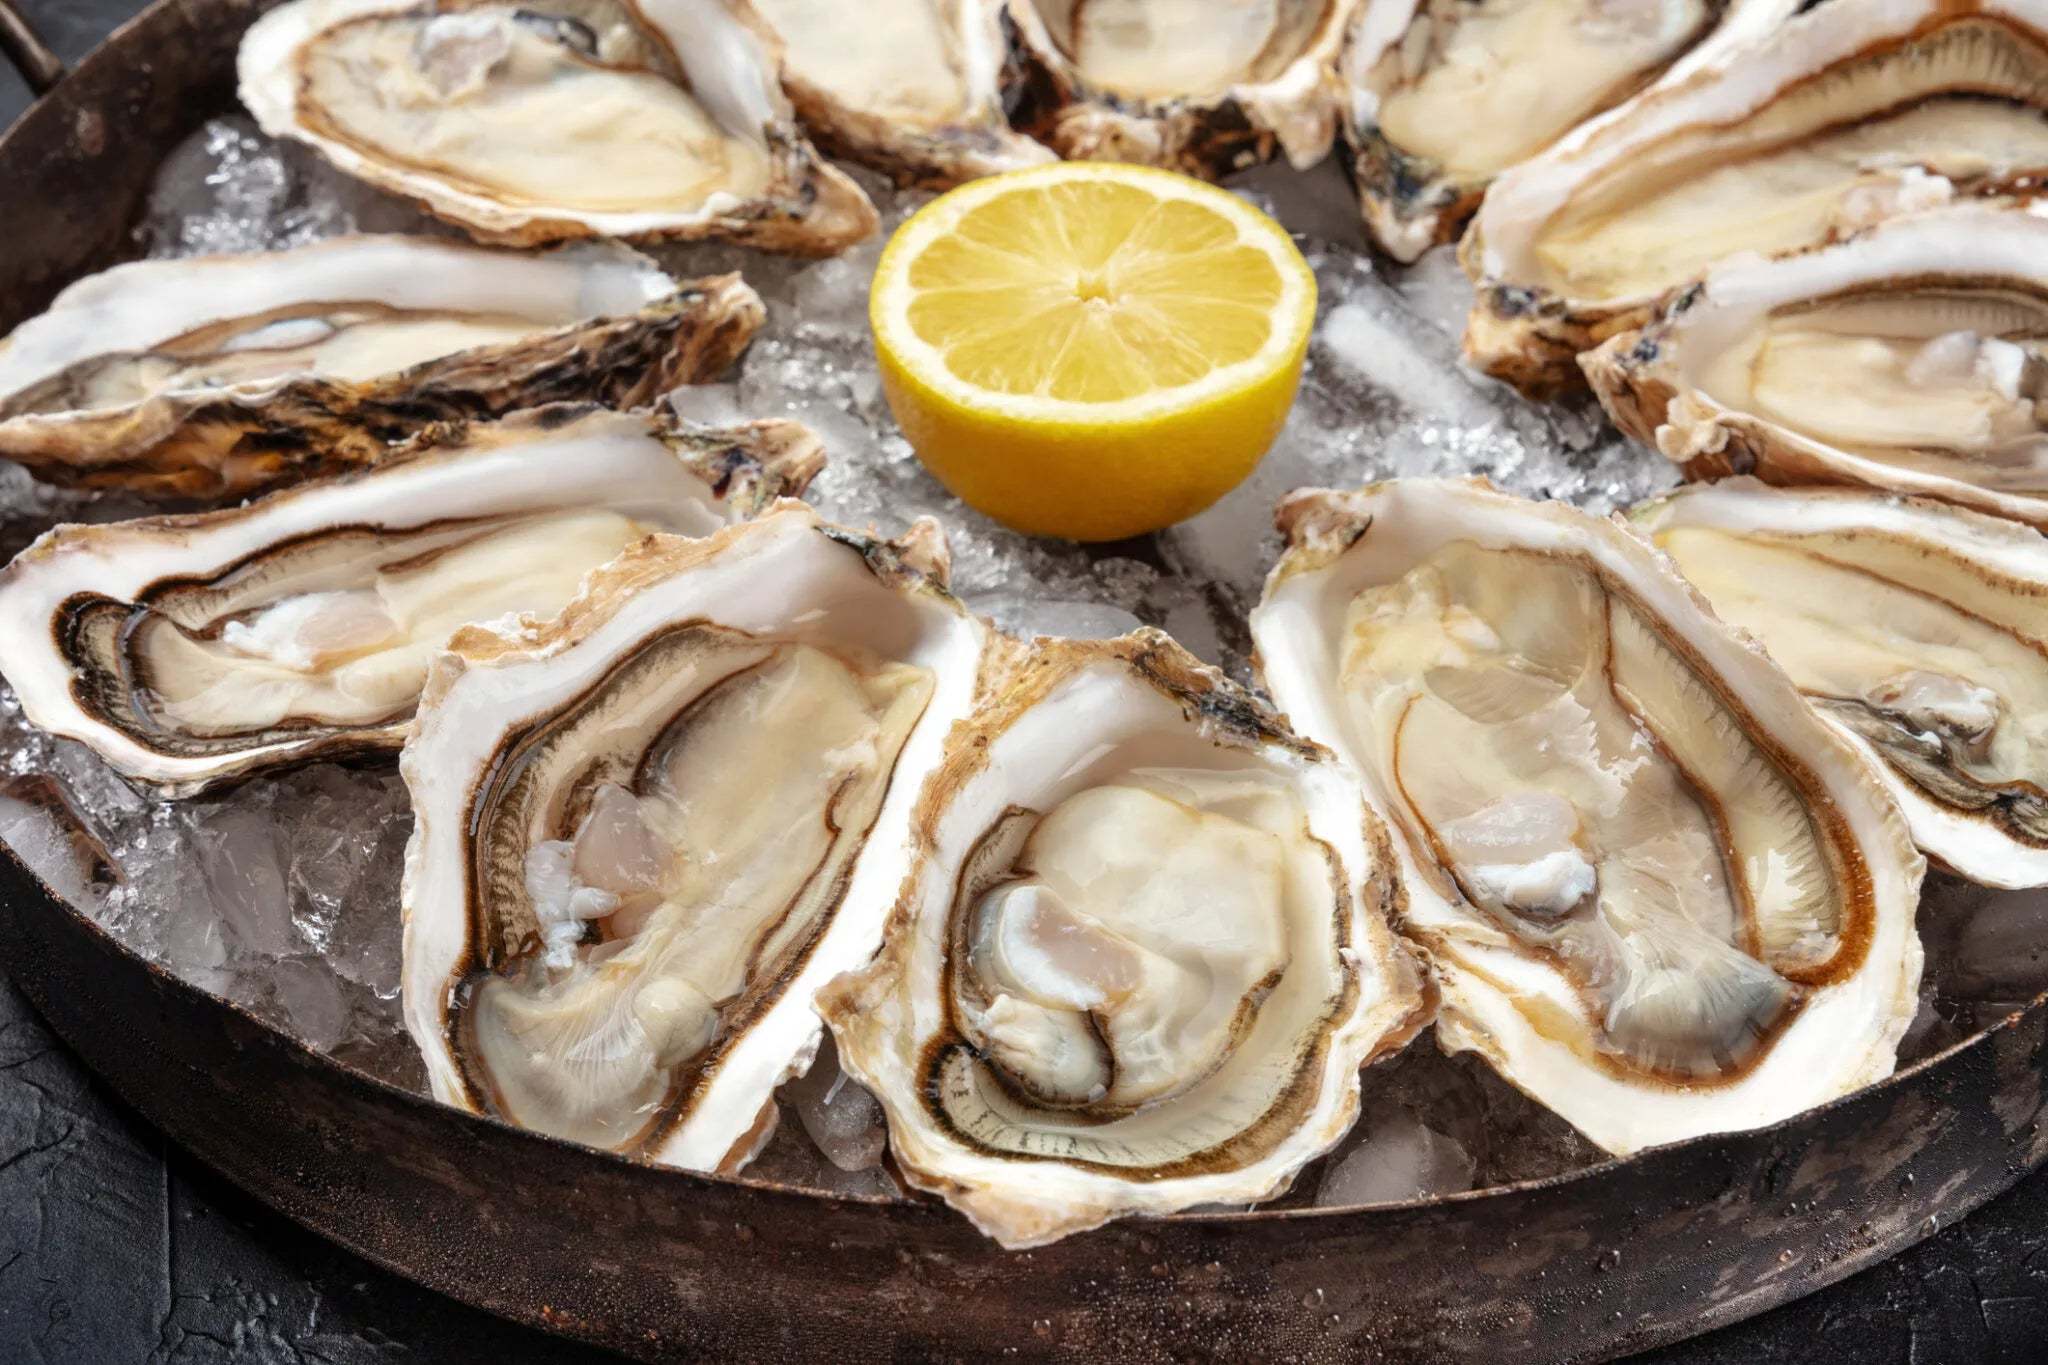
Enhance your oysters with garnishes like fresh lemon wedges, chopped herbs, or a drizzle of hot sauce. Serve them alongside crusty bread, grilled vegetables, or a light salad for a balanced meal. Classic accompaniments like mignonette sauce or cocktail sauce are always crowd-pleasers.
Beverage Pairings for Oysters
Pair your oysters with beverages that complement their flavors. Crisp white wines like Sauvignon Blanc or Chardonnay are excellent choices, as are light beers like pilsners or wheat ales. For a more adventurous pairing, try a gin-based cocktail with herbal notes that echo the oysters’ briny taste.
Tips for Storing Leftover Oysters
If you have leftover oysters, proper storage is essential to maintain their freshness and quality. Follow these guidelines to store and reheat oysters safely.
Refrigeration and Freezing Guidelines
Store raw oysters in the refrigerator at 40°F or lower, keeping them in a breathable container covered with a damp cloth. Avoid airtight containers, as oysters need air to stay alive. For longer storage, freeze shucked oysters in a sealed container with their liquid. Frozen oysters can last up to three months but should be thawed slowly in the refrigerator before use.
Reheating Cooked Oysters
To reheat cooked oysters, use gentle methods to preserve their texture. Place them in a preheated oven at 350°F for 5-10 minutes, or warm them on the stovetop with a splash of liquid to prevent drying out. Avoid microwaving, as this can make the oysters rubbery.