The Ultimate Guide to Steaming Clams Outdoors
Why Steaming Clams Outdoors is the Perfect Summer Activity
Steaming clams outdoors is more than just a cooking method; it’s an experience that brings people together in a way few other activities can. Picture this: a warm summer evening, the sound of waves crashing or a gentle breeze rustling through the trees, and the aroma of fresh seafood wafting through the air. This activity is the epitome of summer, combining the joys of the great outdoors with the satisfaction of preparing and enjoying a delicious meal.
One of the biggest appeals of steaming clams outdoors is its social aspect. Whether you’re hosting a small gathering of friends or a larger family reunion, the process of cooking clams becomes a communal event. Guests can participate in everything from setting up the cooking station to choosing the ingredients for the broth. It’s a hands-on, interactive experience that fosters connection and conversation.
Culinary benefits are another major draw. Clams are a versatile seafood that pairs beautifully with a variety of flavors, from the simplicity of garlic and butter to the complexity of white wine and fresh herbs. Cooking them outdoors enhances their natural brininess, creating a dish that feels like a direct gift from the sea. Plus, the process of steaming clams is quick and straightforward, making it accessible even for those who aren’t seasoned chefs.
Finally, there’s something inherently seasonal about steaming clams outdoors. Summer is the perfect time to enjoy fresh seafood, and clams are often at their peak during this time. The activity also encourages people to connect with nature, whether it’s by sourcing clams locally, cooking by the beach, or simply enjoying the meal under the open sky. It’s a celebration of the season’s bounty and the simple pleasures of life.
Choosing the Right Clams for Outdoor Cooking
The success of your outdoor clam steaming adventure starts with choosing the right clams. Not all clams are created equal, and understanding the differences can elevate your dish. Littlenecks, for example, are small, tender, and slightly sweet, making them ideal for steaming. Cherrystones are larger and meatier, offering a more substantial bite, while steamers (also known as soft-shell clams) have a delicate texture and a slightly briny flavor.
When selecting clams, freshness is key. Fresh clams should have tightly closed shells or close when tapped lightly. If a clam’s shell remains open, it’s likely dead and should be discarded. The smell is another indicator—fresh clams should have a clean, ocean-like aroma, not a fishy or off-putting scent.
Sourcing clams locally is not only a great way to ensure freshness but also supports sustainable fishing practices. Many coastal areas have local seafood markets or fishermen who sell directly to consumers. If you’re not near the coast, reputable grocery stores often carry fresh clams, but it’s always a good idea to ask about their sourcing practices.
Sustainability is an important consideration as well. Overharvesting can deplete clam populations and harm marine ecosystems. Look for clams that are certified by organizations like the Marine Stewardship Council (MSC) or ask your supplier about their harvesting methods. By choosing sustainably sourced clams, you’re not only enjoying a delicious meal but also contributing to the health of our oceans.
Essential Tools and Equipment for Steaming Clams Outdoors
Steaming clams outdoors requires a bit of preparation, but with the right tools and equipment, the process is straightforward and enjoyable. Here’s a checklist to ensure you have everything you need:
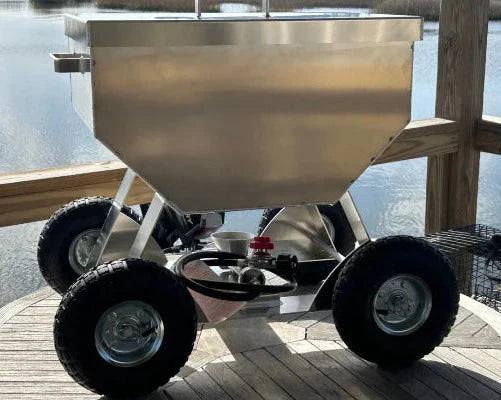
- Large Pot with Lid: A sturdy pot is essential for steaming clams. Choose one that’s large enough to hold your clams and broth without overcrowding. Better yet, any of our seafood cookers will get the job done quicker and efficiently with more capacity and less hassle.
- Steamer Basket: This keeps the clams elevated above the liquid, allowing them to steam evenly. If you don’t have a steamer basket, a colander can work in a pinch.
- Portable Stove or Grill: A portable propane stove is ideal for outdoor cooking, but a grill with a side burner can also do the job.
- Utensils: Tongs, a slotted spoon, and a ladle are must-haves for handling hot clams and serving the broth.
- Seafood Cracker: While not essential, a seafood cracker can be helpful for breaking open stubborn shells.
- Outdoor Table Setup: A sturdy table for prepping and serving makes the process more convenient. Consider adding a tablecloth for easy cleanup.
Optional items like a large cooler for storing clams before cooking, a cutting board for prepping ingredients, and a trash bag for shells can also come in handy. Having everything organized and within reach will make your outdoor cooking experience smooth and enjoyable.
Preparing Clams for Steaming
Before you start cooking, it’s crucial to prepare your clams properly. Clams often contain sand and grit, which can ruin the texture of your dish if not removed. The first step is to rinse the clams under cold running water, scrubbing the shells gently with a brush to remove any debris.
Next, you’ll need to purge the clams. Place them in a large bowl of cold, salted water (about 1/3 cup of salt per gallon of water) and let them sit for 20-30 minutes. This encourages the clams to expel any sand or grit inside their shells. Repeat this process with fresh water until the water remains clear.
While cleaning, inspect each clam carefully. Discard any with cracked or broken shells, as well as those that remain open after a gentle tap. These are signs that the clam is dead and unsafe to eat.
Proper preparation not only ensures a clean and delicious dish but also minimizes waste. Taking the time to clean and inspect your clams thoroughly is a small effort that pays off in the final result.
Step-by-Step Guide to Steaming Clams Outdoors
Setting Up Your Outdoor Cooking Station
Choose a flat, stable surface for your cooking station, away from flammable materials. Set up your portable stove or grill and ensure you have all your tools and ingredients within arm’s reach. Safety is paramount, so keep a fire extinguisher or a bucket of water nearby, especially if you’re cooking in a wooded area.
Adding Flavorful Ingredients
The broth is the heart of steamed clams, infusing them with flavor as they cook. Start with a base of water or seafood stock, then add aromatics like minced garlic, shallots, and fresh herbs such as parsley or thyme. A splash of white wine or beer adds depth, while a pat of butter creates a rich, velvety texture. For a spicy kick, consider adding red pepper flakes or a dash of hot sauce.
Cooking Clams to Perfection
Once your broth is simmering, add the clams in a single layer to ensure even cooking. Cover the pot and let the clams steam for 5-7 minutes, or until their shells open. Avoid overcooking, as this can make the clams tough and rubbery. Discard any clams that remain closed after cooking.
Delicious Side Dishes and Pairings for Steamed Clams
Steamed clams are a versatile dish that pairs beautifully with a variety of sides. Crusty bread is a classic choice, perfect for soaking up the flavorful broth. Corn on the cob, grilled vegetables, or a fresh green salad add a touch of brightness and balance to the meal.
For beverages, a chilled white wine like Sauvignon Blanc or Pinot Grigio complements the briny sweetness of the clams. If you prefer beer, opt for a light, crisp lager or a citrusy IPA. Non-alcoholic options like sparkling water with a twist of lemon or a refreshing iced tea are equally delightful.
Tips for Hosting a Clam Steaming Party Outdoors
Planning Ahead
Estimate about 1-2 pounds of clams per person, depending on appetites and side dishes. Prepare your ingredients and tools in advance to minimize stress on the day of the event.
Creating a Relaxed Atmosphere
Set the mood with simple outdoor decor, such as string lights or lanterns. Provide plenty of seating and consider playing soft background music to enhance the ambiance.
Troubleshooting Common Issues When Steaming Clams Outdoors
If your clams don’t open, they may have been dead before cooking—always inspect them beforehand. Sand in the broth can be avoided by thoroughly purging the clams. Equipment malfunctions can be mitigated by testing your setup ahead of time.
Cleaning Up After Your Outdoor Clam Steaming Adventure
Dispose of shells responsibly by composting or discarding them in a sealed bag. Wash your equipment with hot, soapy water and leave your outdoor space as clean as you found it.
Frequently Asked Questions About Steaming Clams Outdoors
- How long do clams take to steam? About 5-7 minutes.
- Can I steam clams without a steamer basket? Yes, a colander or directly in the broth works too.
- What’s the best way to store leftover clams? Refrigerate in an airtight container and consume within 1-2 days.
Final Thoughts: Embracing the Joy of Outdoor Clam Steaming
Steaming clams outdoors is a delightful way to enjoy fresh seafood, connect with nature, and create lasting memories. With the right preparation and a touch of creativity, it’s an experience you’ll want to repeat every summer.


